
If you are thinking of starting a bullet journal but you don’t know where to start, then read this post. It will provide you with a step by step of how to start a bullet journal.
Are you new to Bullet Journaling? Or curious about it? Well you’ve come to the right place!
Here I want to show you my basic approach to Bullet Journaling, however I highly recommend you go and read the information at www.bulletjournal.com and watch the video there as well. This will give you all the ins and outs of bullet journaling and is highly informative.
So why would I bother with this post then?
Well, when I told my husband about my bullet journal recently, I suggested that he look it up and maybe start one himself because I believed he would find it very helpful in his life. Bless him, he did look it up and got all sorts of confused.
If you’re reading this, maybe you’re all sorts of confused too. There is a lot of jargon that comes with bullet journaling and so many beautiful images out there on social media so it’s totally understandable. The following is supposed to help you ease into it, by showing you how I set up my bullet journals.
What you need:
- A notebook
- A pen/pencil
That’s it. And they don’t have to be expensive or fancy. Any old notebook or pen/pencil will do.
To begin:
Lets leave a page blank for a Key, we’ll get back to this later, after we focus on the four modules that makes a journal a bullet journal.
1 INDEX
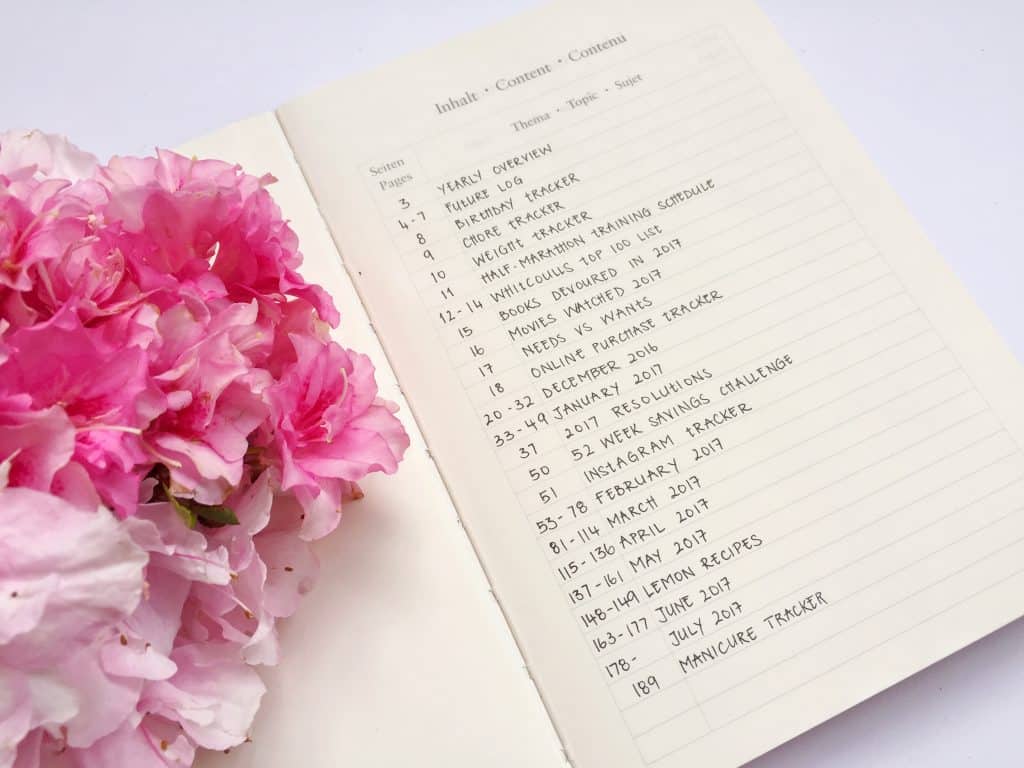
Some notebooks such as the Leuchtturm or Scribbles That Matters notebooks have an index set out for you. If you have a blank notebook, leave a few pages free for an Index. An index is like a contents page, where you can quickly reference all your collections. As you add to your journal, you note the page numbers and the items here. This does mean that if your notebook pages aren’t numbered you’ll have to number them as you go. The above is my Index in an A5 Dotted Leuchtturm.
2 FUTURE LOG
Next comes the Future Log, this is where you note down events or tasks that are scheduled for the future. I set this up after the Index and I usually create space for 12 months in advance, so that I have a whole year ahead of me. And since the system is fully flexible, if you started your journal in March for example, then start your Future Log in April (you’ll deal with March in the Monthly Log).
Here was my very first Future Log:

This then evolved into this format which provides me with more space to write appointments, tasks, and events:

If you don’t know how to format your Future Log, I suggest you go with the original Bullet Journal layout which is to split each page into three with each section as it’s own month, see here.
3 MONTHLY LOG
After the Future Log, the fun begins! I set up my monthly log at the start of each month (or during the weekend before). This will give you an overview of the upcoming months appointments, events and tasks. In preparing this, I refer back to the Future Log for the month in question and transfer items into the Monthly Log from there. The original Monthly Log as per bulletjournal.com looks like this, with the month on the left hand page, the dates going down the left hand side, and tasks/notes/goals written on the right hand page.
Here is my first ever Monthly Log:

Of course, there are many ways to create a Monthly Log, there is plenty of inspiration out there on social media, but if you’re new I suggest you stick to the basics and see how that works for you before adapting it.
4 DAILY LOG
This is what you use day-to-day. I usually set up my Daily Log first thing in the morning while having my breakfast. Here you set up with the date as the heading and “Rapid Log” all the tasks, notes and events for the day. This is an example of a simple daily log:
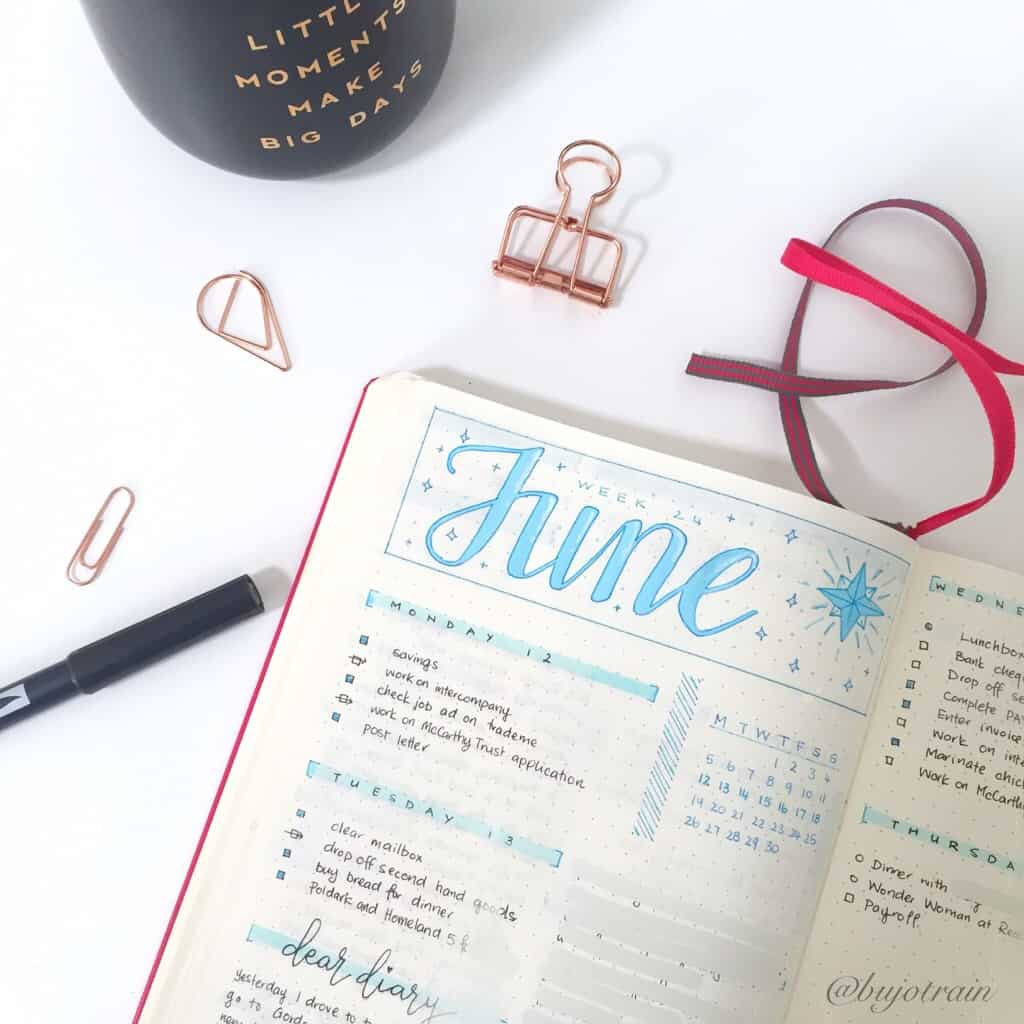
An alternative to the Daily Log which I currently use at the moment is a Weekly Log. So at the end of each week, I set up a Weekly Log for the week to come. This enables me to see what I have on during the week at a glance, and I can quickly set up time-sensitive tasks. This is particularly useful if you don’t have time to set up a Daily Log each day (although in it’s simplest form a Daily Log shouldn’t take you more than 5 minutes) or if you don’t have a multitude of tasks to get through each day. Here is an example:

Now back to the page we left free for a Key. The Key is basically a list of all your bullets and signifiers that you use to help organise all your entries. I actually don’t have a Key in any of my Bullet Journals (gasp!). I feel like a Key is like a tattoo, once you’ve inked it in, you can’t change it without much pain and suffering. Even though I use the same bullets and signifiers most of the time, I do tend to feel like a change sometimes. Sometimes I like dots for tasks, sometimes I like squares. Hence why I don’t have a key. But it is my Bullet Journal and I always remember what my bullets mean, so I don’t feel bad that I don’t have one. The Bullet Journal is customisable, so you do what you feel is best. If you want some examples of what bullets and signifiers you can use, I suggest you look at www.bulletjournal.com
So that is the bare bones of my Bullet Journal. I do have other Collections which I also keep in my Journal, but those are for another day.
I hope you found this article helpful, if you have any questions please leave a comment below. I’d love to hear from you!

If you enjoyed this article, share it on Pinterest!

